Running Roxie/Xroxie on Windows
Roxie runs natively on Linux. To use it on Windows, it needs a Linux subsystem to run. On Windows 10, Linux subsystems are supported natively via WSL (Windows Subsystem for Linux). Alternatively, a full Linux machine can be used. Either virtual machines locally (VirtualBox, etc.), reomtely (CERN Openstack, cloud services), or a full Server machine running Linux.
To Access the Xroxie GUI, we use X11 forwarding. This can be either Native (via WSL, fastest), or using 3rd party tools (VCXSRV, X-win 32).
The last option is to use a Remote Desktop Connection to a remote machine and forward the full Desktop environment.
The following sections describe the different options, and how to set them up.
Use Windows Subsystem for Linux
Recent installations of Windows 10 provide a Full linux subsystem within windows, which simplifies installation and execution of linux commands on windows. The following links and steps provide a setup description on how to get it set up on a computer:
- Follow the installation steps from AlmaLinux 8 Windows Subsystem for Linux
- Open a new terminal for AlmaLinux8
- Connect to a Roxie Server:
ssh -Y <hostname>, for examplessh -Y lxplus.cern.ch - Load the roxie executables, as described in Installation at CERN
- Start using Roxie:
Xroxie,runroxie <datafile>, etc.
Run roxie locally without server
The installed AlmaLinux8 can install roxie as a local installation, following the installation instructions for outside of CERN
Advanced: Run locally with full access to EOS/AFS within CERN
It is possible to update the AlmaLinux8 installation to enable CERN services (EOS, user accounts) and access roxie executables from there, thus running roxie locally without installing the executables. The setup is a bit more complicated and requires a few more steps:
- Open a terminal for AlmaLinux8
-
Enable systemd services (required for eos): Write a new file
/etc/wsl.confand fill it with the following lines: -
Shutdown the machine with
wsl.exe --shutdown. - Reopen a new AlmaLinux8 terminal
- Add Cern repositories
sudo dnf config-manager --add-repo https://linuxsoft.cern.ch/cern/alma/8.7/CERN/x86_64/
sudo dnf update --nogpgcheck -y
sudo dnf install dnf-autoupdate -y
sudo dnf install locmap-release -y
sudo dnf install locmap -y
sudo locmap --enable all
sudo locmap --configure all
- If everything runs OK the terminal should now have access to EOS and AFS.
- For every session, the Kerberos ticket (for access to the CERN resources) need to be updated
- Source roxie from EOS, and run test cases
VNC Server + LXPLUS
If you prefer a graphical interface to the linux machine, you can set up a VNC connection.
- Install a VNC client (for example TightVNC from https://www.tightvnc.com/download.html
- Start a VNC server on lxplus
ssh -C <user>@lxplus.cern.ch "vncserver -localhost -fg"
#The server will tell you the lxplus host and the index of the VNC server, for example:

New 'lxplus784.cern.ch:2 (mbonora)' desktop is lxplus784.cern.ch:2

# Points to lxplus784, with vnc server index 2
- In a new terminal, open a SSH tunnel
For this example:
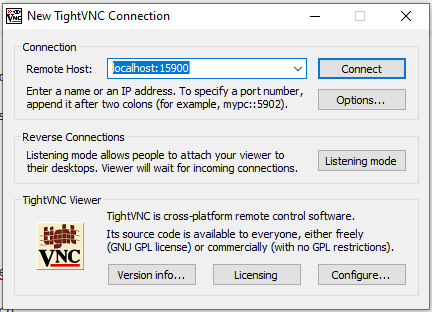
- Start the VNC client, and connect to
localhost:15900
Putty + VCXSRV (deprecated)
If you don't have access to WSL2, you can install a Windows X server for GUI forwarding, and connect to a linux server with any terminal. The following example describes the use of vcxsrv + putty, but different combinations are possible.
- Install vcxsrv (or any Windows X server of your choice). You may get an installer from https://sourceforge.net/projects/vcxsrv/
- Install putty (e.g from CMF)
- Open Windows Start menu and start XLaunch. Follow the installation procedure below:
- Select
Multiple Windows
- Select
Start no client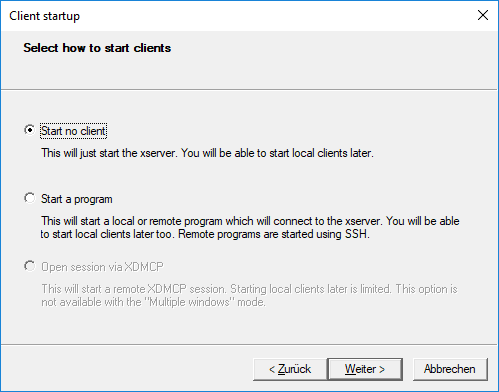
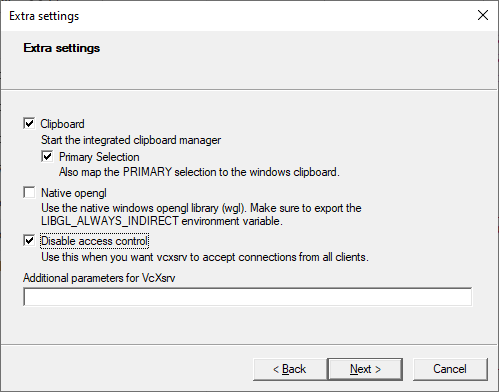
- Select extra settings as below
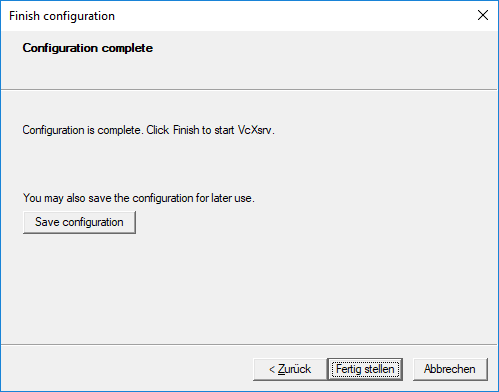
- Click
Save Configurationand save the configuration in one of the following: - %appdata%\Xming
- %userprofile%\Desktop
- %userprofile%
- Click Finish
- Select
- Setup a new putty connection
- Make sure to enable X11 forwarding (Connection/SSH/X11 -> Tick "Enable X11 forwarding)
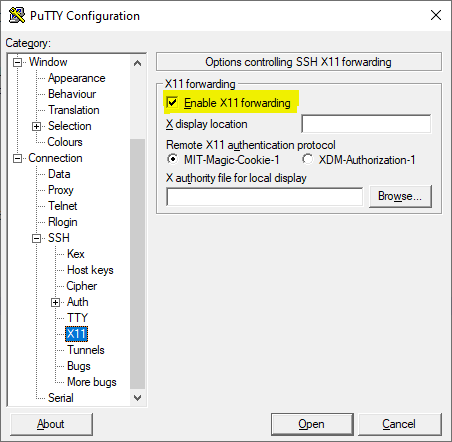
- Make sure to enable X11 forwarding (Connection/SSH/X11 -> Tick "Enable X11 forwarding)
- Launch the connection
- From the terminal, start Xroxie or runroxie directly